Bentley AutoPLANT Environment variables or % variable list

I always said I would do this and I have hit the last straw since I need it often – here is a list of them all. [1 week later] – some of the items are defined in the [ALIAS] section of the AT.INI file in C:\ProgramData\Bentley\Plant V8i\CFG\AT.INI

  • %APP_DIR% is simple the short directory name of the application that you are using.
    • For example, if a file is stored here, the app is the SHORT bolded text
      c:\My Favorite Project\ELECT STUDY\Config\modules\CableT\piping\Draw\myfavorite_drawing_vb_file.ebs
  • %PROJECT_ROOT%
    • – using the same example as above, it is the bolded text
      c:\My Favorite Project\ELECT STUDY\Config\modules\CableT\piping\Draw\myfavorite_drawing_vb_file.ebs
  • %NETWORK_ROOT% –c:\Program Files (x86)\Bentley\Plant V8i\Help\MyFavoriteHelpFile.chm

    but don’t let “network” fool you as it is most likely on your computer

  • %Local_Root% – not sure yet – but here is a samle context: %Local_Root%\modules\AT_CBLTR.mnu
  • %CUSTOM_ROOT%=C:\ProgramData\Bentley\Plant V8i\Bentley Plant V8i Configurations\
  • LOCAL_ROOT=C:\ProgramData\Bentley\Plant V8i

Bentley AutoPLANT coding best practices

  • comment lines. There can be too much – but not likely – comment, comment comment
  • use camelCase for variables – classes – use a capital letter to start
    • avoid underscores
    • never use spaces
  • prefix all functions with elb_ or your company name
  • document with pictures
    • use a blog
    • if you store pictures, do so in an easy to transport tool like powerpoint – because everyone has this as a tool
  • all code should be version controlled. If you don’t have one, download SourceTree a github.
  • where possible feed in only human understandable variables -the least possible
    • these variables should be well documented via a blog and this url linked into the code comments at the top.
    • let your computer program do all the hard work with math
    • there will be some hardcoding like the thickness of a peice of metal – however, with “hardcoding”
      • avoid it when possible
      • never hardcode in-line but abstract a niceVariableNameWithCamelCase and then assign the hardcoding to that. Use this variable over and over.
      • put all you hardcoded variables at the top of your routine

Specification Field Definitions retyped.

When you print the spec fields and their meanings to pdf using the print driver I had, it jumbled many words – Hence I copied it here for my own and your reference – I added a few columns for a colleague s well to add more electrical context than the piping-centric docs would naturally give. The AutoPLANT Component Use column is originally from Bentley (this is my attempt at getting over any copyright concerns – this is NOT my work but Bentley’s)

The spec gen help is OK, but it does not have an ‘overview’ feel. Here is a link to someone who already put together an article with links to good information. Unfortunately, the picture links don’t link his pictures and diagrams.

Note: ** indicate that the field will affect the system ID for the component

# Field Name Specs
asked
for …
What should be asked for AutoPLANT Component Use
Continue reading

Making a new electrical component in raceway/electrical package – Start to Finish

This tutorial / step-by-step can be used as a training manual. If you want the log book style article on how to figure all this out see the other article. No lesson in Bentley Docs describes this. There is a help file on linking in the Equipment Modules as a .ebs drawn entity and how to edit those classes. This is for the Piping module side of things for Electrical items – the concepts can be used for any piping module application.

Step 1. Start Class Editor and gather info

  1. Open your Class Editor
  2. Open your project under the menu File->Open Continue reading

Notes on Making a new Class for Bentley AutoPLANT electrical components (Raceway)

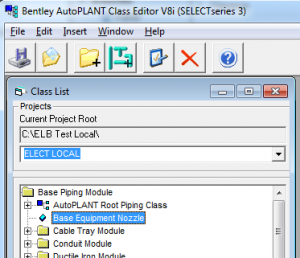
class_heirarchyThis is my log on figuring out how to make new Electrical / Raceway (piping module!) components and I hope to help you know the ins and outs. From this, I made another post which is more “do this, do that, etc.” for those that just want to get things done. I needed to write down many notes, so I did so here as it is quicker to type and I can copy/paste stuff back out of this article as I needed the info.

Basically, my spec gen is broken and there is no help available to at the moment so how do I make a new component in the piping module/app? Electrical components seem to piggy back on this module as well. Since I will be referring my handwritten notes as this happens in spurts and I will need to refer to it in 6 months, I thought I would write things down.This will also be used to train on this stuff once I clear the way in our electrical department. So how do we get new specs, new drawing files etc. How is this hole spec, drawing, database thing linked? This too will be answered along the way for you to follow. If you know why my spec gen is broken let me know (here is a link to my exact woes which others have too) Continue reading

Report Server Report add a mailto: link in the report rows

I am just getting familiar with report services and making a report with Business Intelligence. I think you can do the same with Report Builder 2.0 – if someone would comment I will update the post. I wanted to add a mailto: link with a subject. You are allowed in expressions, to use any .net function you want, but there is a way to do this.

Not every dll is included by default, and what I wanted to use was the System.Web.HttpUtility.UrlEncode() function. Here is the magic that makes it work:link.

In short, if you are a programmer you would normall put an Imports System.HttpUtilty at the top and then use the function with HttpUtility.UrlEncode()

If you do this, the Intellisense (when the code completes the strings for you) will kick in. This is how you know if it is working.

Basic Steps:

  1. Click menu Report->Report Properties
    1. what? no report menu? Ok – right mouse click in the area just outside the tablix and choose Report Properties
  2. Click References on the Left, then Add at the top and the … button to get a list
  3. Scroll down and include System.Web, click OK, then OK again
  4. Put a place holder in any cell by R-Click->Create Placeholder
  5. Click, THEN Right Mouse click on the placeholder and choose Placeholder Properties
    1. General Tab fill in the name, the text to show (might be an expression of =”my text here” and tooltip
    2. Action Tab: Choose “Goto URL” and fill the function listed below
    3. Format your text
  6. Click OK twice
  7. Click Build-Build Project_Name to see if it worked

[vb]

="mailto:me@mycompany.com?subject=" & System.Web.HttpUtility.UrlEncode("Topic:" & Fields!Topics_ID.Value & " " & Fields!TopicText.Value).ToString.Replace("+"," ") & "&body=" & System.Web.HttpUtility.UrlEncode("Q: " & Fields!Topics_ID.Value & "." & Fields!Questions_ID.Value & " " & Fields!QuestionText.Value & vbCrLf & vbCrLf).ToString.Replace("+"," ")

[/vb]

Report Services & SQL Server install and set up for use with Bentley AutoPLANT

I am using report services to publish my reports instead of using Crystal Reports for many Bentley AutoPLANT items. Here is my journey over the past couple of weeks:

Install the Tools

If you set up SQL Express with Advanced Services – this is 2008 (download link) – not 2008 R2 (download link). If you are going to back up a Bentley AutoPLANT database – you can NOT restore a 2008 R2 database to a 2008 server, you have to use another method.

  • To make reports, you can use Business Intelligence which comes with SQL 2008 Express with Advanced Services (thanks Geordie Guenther!)
  • A co-worker recommended a really easy tool to make reports that got me 90% of the way (but not advanced) called Microsoft Report Builder 2.0 (there is a 3.0 but we are still in a 2008 SQL Server world). I really like Bus. Intell because it is like Visual Studio and you can do much more.

Get Familiar with things:

Changing the server name or location of a linked Table in MS Access

Why is this so confusing? It isn’t but it is quite convoluded on how to get this done. I had to do this because the connections to my SQL Express database had to have the port name in the connection.

So on my local machine, I could open up the MS Access file with tables linked to the computer named CDC-EBLEY2-7\SQLEXPRESS, but if you were to open the file from someone else’s computer, an Connection failed: SQL State: ‘01000’ SQL Server Error 67 SQL Server Error: 17 (blah blah blah) resulted. Why? Because I enabled my server to be connected to via TCP/IP over port 1433 – which are the defaults, but it has to be explicitly set in the connection string of every table. What I needed was to connect to CDC-EBLEY2-7,1433\SQLEXPRESS so others could open the MS Access file and NOT get errors. This is strange, because 1433 is the default port any way – but it works.

Each one of my tables is not through an ODBC setup but each table has it’s own string which needs to be updated

Lets get some info first. Open notepad and get ready to copy the DESCRIPTION of the linked table’s construction. Here’s how

  1. Open MS Access
  2. Right mouse click on a table that used to work or you are sure does work and choose “Design View”. This does not make sense for a linked table, but bear with me.
  3. Select Yes on the warning screen to continue
  4. If, on the right, there is no properties window for the table, on the Ribbon (Access 2010) click Property Sheet
  5. This reveals a Description property – copy all that it is in that property it and paste it into Notepad or somewhere for later.
  6. Click the External Data in the ribbon and choose ‘Linked Table Manager’
    1. CLick the Always prompt for a new location check box – this is a complicated way to ask the user if (s)he wasts to change the connection info
    2. Click Select All button or choose the tables you wish to update with check marks
    3. Click OK
  7. A dialog comes up. Click New
    1. Choose SQL Server as your driver
    2. CLick the Advanced Button
    3. Paste all that stuff in Notepad
      1. EXCEPT REMOVE the TABLE=… stuff up to the next semicolon.
      2. change the server name to be CDC-EBLEY2-7,1433 where 1433 in my example is the port n
      3. Click OK
    4. It then prompts you to save all this into a file for later. Chooose a spot in My Documents in a connections folder – or better yet on a network location for other’s to use later
    5. Click OK a couple of times
    6. Now Access will replace all your tables with the new DSN (connection details) string.


Using Smart Youtube Plugin

Adding to the sidebar? See the first set of instructions. Adding to a post (article) or a page? See the 2nd set of instructions.

Common info

For you – simply insert a normal weblink for a youtube video. For example, an seminar promo video for a seminar called “IMPRESSION” has a youtube link of :

http://www.youtube.com/watch?v=w5jIMphTm9w

Where it says below to change http to httpv – there are MORE options and they are listed at the following link – scroll down about 1/2 way cause the stuff at the top is promo fluff.

http://www.prelovac.com/vladimir/wordpress-plugins/smart-youtube

First – what NOT to click on or change – I warned you

One of my customers clicked on the obvious link – Smart Youtube Settings  on the left of the wordpress admin section. Don’t do it – you will be sorry (you have been warned 😉 )! This is for geeks only … but then why do they make it so tempting to click on? I don’t know – one of life’s ironies. Simply do follow the instructions below and you will be better off – get a geek to fiddle with the Smart Youtube Settings area. 🙂

Sidebar additions:

To add a Smart Youtube link to your sidebar or long vertical area on the right of all your pages (“Primary Sidebar”) you would do the steps below. Remember – you might have a few sidebars (like a blog sidebar) you want to add the video to – do these steps for all sidebars.

  1. log into your site’s admin or back end http://www.yoursite.com/wp-admin
  2. on the far left, click the menu Appearance->Widgets
  3. using find, or your eyes, look for “Smart Youtube”. You have scroll down a bit
  4. click “Add”
  5. it now brings you to a place that you have to paste the link like in the email bel
    1. add a title that appears ABOVE the video in the sidebar
    2. THE TRICKY BIT & MAGIC BIT – CHANGE THE http to httpv – so your link will be httpv://www.youtube.com/watch?v=w5jIMphTm9w (you have to edit/force it to be this)
    3. Choose the radio button (round check mark like thing) beside “Leadershift Blog, Category”
    4. on the right of this text, use the pulldown marked –Select– and choose the order in which you want it to appear – I think you want #1 (top) so your visitors will see it.
  6. click “Save Widget” at the bottom
  7. If you want finer control over things – go to the webpage below, scroll down to “Installation and Usage” and look at the options that this plugin has. You can control the size, the quality etc. of what is shown. Click this link (same link as given above) to see more options (scroll 1/2 way down first)
ALWAYS preview your work – check it out on all pages that have that sidebar (remeber not all links/menus etc. have the same sidebar).

NOTE – TEACHING MOMENT: – you can have different sidebars for different parts of your site. So when you get into teaching mode, and have blogs/categories for them, you could provide special links for your students – which you would NOT include for your main visitors whom you are trying to get hooked.

Adding to an article (post or page)

  1. log into your back end of your website http://www.yoursite.com/wp-admin
  2. go to the article where you want to insert it
  3. add a link to the video
    1. so first, type some text like “IMPRESSION Video” (You won’t see this text anyways)
    2. next highlight the above phrase
    3. click the chain links button to make a link
  4. paste your youtube link above into the box labelled “URL”
  5. THE TRICKY BIT & MAGIC BIT – CHANGE THE http to httpv – so your link will be httpv://www.youtube.com/watch?v=w5jIMphTm9w
  6. click Link button at the bottom
  7. If you want finer control over things – go to the webpage below, scroll down to “Installation and Usage” and look at the options that this plugin has. You can control the size, the quality etc. of what is shown. Click this link (same link as given above) to see more options (scroll 1/2 way down first)