iOS app image size matrix for projects. Track your sizes using this tool.

This is for a personal project a friend and I are doing – there are soooo many iterations of graphics that we need because we want things to look crisp. The intent for the table below to be copy& pasted and a column exists next to each resolution for a check mark to put beside each completed task. Keeping track of all this was almost a nightmare – I know this is specific to our project, but I trust this is useful for you too – copy and paste away.

Please see naming conventions for this project at the end of this article.

Rotation iPhone 3″ iPhone Retina 3″ iPhone 5 (4″) iPad/ Mini * iPadRetina*
Cover Portrait Lscp 90 deg R 480×320 960×640 640×1156 768 x 1004 1536 x 2008
Cover LandScape landscape 1024 x 748 2048 x 1496
Guts/Main Page landscape 480×320 980×640 1136×640 1024×768 2048×1536
buttons/segmented Controls landscape 52 x 44 104 x 88 104 x 88 52 x 44 104 x 88
default camera image landscape same as guts same as guts same as guts same as guts same as guts
ring and check image 300 x 300 300 x 300 300 x 300 300 x 300 300 x 300
appIcon 72 x 72px 144 x 144px 144 x 144px 72 x 72px 144 x 144px
iTunesArtwork n/a 512 x 512 1024 x 1024 1024 x 1024 512 x 512 1024 x 1024
iPhone: settings/spotlight n/a 29 x 29 58 x 58
iPad: settings** n/a 29 x 29 58 x 58
iPad:spotlight n/a 50 x 50 100 x100

NOTE: iPads and iPhones do NOT have the same aspect ratios – so you graphics will be stretched and interpolated by the device’s software/hardware.

Links

Naming Conventions used in this project

All retina images MUST be names @2x at the end for this project. So myImage.png would be myImage@2x.png for this project. For the 4″ retina screen please put -568h@2x at the end.

iPad main page images “page05_ipad.png” and “page05_ipad@2x.png” seems to be close to what you have now.
iPad masks: “page05_ipad_Pic_Insert.png” and “page05_ipad_Pic_Insert@2x.png”

iPhone main pages: “page03_480x320.png”,”page03_480x320@2x.png” and “page03_480x320-568h@2x.png”

iPhone masks: “page03_pic_insert_480x320.png”, “page03_pic_insert_480x320@2x.png” and “page03_pic_insert_480x320-568h@2x.png”

Cover pages for this project should be named like you have done the others, but lets call it Cover WWWxHHH.png, Cover WWWxHHH@2x.png and Cover WWWxHHH-568@2x.png . Cover pages MUST be rotated 90 degrees Right (clockwise)

There are 2 folders that these are dumped in “SmallImages” (iPhone) and “LargeImages” (iPad)

Rotation iPhone 3″ iPhone Retina 3″ iPhone 5 (4″) iPad/ Mini * iPadRetina*
Cover Portrait Lscp 90 deg R Cover iPhone Cover iPhone@2x Cover iPhone-568h@2x Cover iPad90 Cover iPad90@2x
Cover LandScape landscape Cover iPad Cover iPad@2x
Guts/Main Page landscape page03_iPhone page03_iPhone@2x page03_iPhone-568h@2x page03_ipad page03_ipad@2x
Guts Masks page03_pic_insert_iPhone page03_pic_insert_iPhone@2x page03_pic_insert_iPhone-568h@2x page03_ipad_Pic_Insert page03_ipad_Pic_Insert@2x
last main Page
buttons/segmented Controls landscape
   – book book_icon book_icon@2x n/a n/a n/a
   – camera camera_icon 100 x 88 n/a n/a n/a
   – take pic 50 x 44 100 x 88 n/a n/a n/a
   – lock LockIconClosed LockIconClosed@2x n/a n/a n/a
   – correct incorrect_ipad incorrect_ipad@2x n/a n/a n/a
   – incorect incorrect_ipad incorrect_ipad@2x n/a n/a n/a
default camera image landscape Insert_Instructions_iphone Insert_Instructions_iphone@2x Insert_Instructions_iphone-568h@2x Insert_Instructions_ipad Insert_Instructions_ipad@2x
ring and check image correct_green_iphone correct_green_iphone@2x n/a n/a n/a
appIcon Icon.png Icon@2x.png n/a Icon-72.png Icon-72@2x.png
iTunesArtwork n/a iTunesArtwork iTunesArtwork@2x n/a n/a n/a
iPhone: settings/spotlight n/a Icon-Small.png Icon-Small@2x.png
iPad: settings** n/a Icon-Small.png Icon-Small@2x.png
iPad:spotlight n/a Icon-Small-50.png Icon-Small-50@2x.png
orange text means I don’t have a nice name yet
Put iPhone images in a directory called SmallImages and iPad images in a directory called LargeImages

Notes

Copy/Paste from apple: For iPad launch images, do not include the status bar region. Create launch images of these sizes (most iPad apps should supply a launch image for each orientation)

** Apple trims off 1px (low res) or 2px (retina) on each side for drop shadow

NOTE: Mathematically – always reduce your graphics 50% or more – never resize up and never resize between 50% and 99%. There are mathematical reasons for this … it is called aliasing. Apple does a good job at re-rendering graphics, by why not do our designs with a little understanding while we are about it 🙂
my Offline Web App – applicationCaching and manifest files in html5. IT WORKS TOO!

My Need: I tried to make my own iOS app that would take html, scrape the links, get and store the data, change the links and cache a new html file.

OK – as usual – someone already solved that problem (it always happens).

Here are some AWESOME links to help me build my solution – I am SURE you will find them beyond helpful like I did..

Why this app: Something so I can not have to count on my wifi or 3G when reading parent/kid teaching material because we might be camping, or most of the time- JUST out of reach of the wifi and we are lying in bed. 3 year old don’t have patience for you to get in range, start up facebook … again type your group name in only to find that the links on the wall are outdated. I have 3 kids in 3 different age groups. I need something that is JUST GOING TO WORK when I need it to work. And it does – nice.

Design thoughts, steps and resources that you can use too: I want an app that is offline – well html5 has a solution already AND IT WORKS and there are some really smart guys with a lot of good material. Let me bookmark the ones that got me going

  1. installed a wordpress site
  2. got a blank or simple html5 template that I could hack (or build into is what I actually did). I read this book a while back.
  3. in my plugin in I added some code to call my new template and I requested a manifest file with the &manifest=1 GET parameter
    1. this then calls the single.php page which, when it sees the &manifest=1 goes and
    2. calls a new header called header-manifest.php and I=
    3. make the template also redirect to single-manifest.php which together
    4. spits out the manifest headers with[html]Content-type: text/cache-manifest[/html]
    5. Read more about what to spit out with these links
      1. Offline Web Applications – Dive Into HTML5
      2. How to create offline webapps on the iPhone | The CSS Ninja – All things CSS, JavaScript & HTML
      3. This is start to my app which uses what these guys do with javascript so you can SEE or understand what is going on. THESE GUYS ROCK – the client javaScript side needs to be working to monitor progress for your users. Read the comments below and you can see you only need to do an ajax query to the local cached version of your html manifest file (that is cool too) so you don’t have to fetch 3 times from the server
        1. fetch 1 – the page
        2. fetch 2 – the same page but ransacked for all the pdf links and other resources to cache
        3. fetch 3 – not required any longer due to buddy’s comment in the above link – but a pull of the manifest file to do some regex’s and get the # of manifest items so you can see your progress.
      4. To include jQuery – use this link from google
      5. Some stuff from Apple Safari Web Content Guide: Storing Data on the Client
        1. apple  / iOS has some issues with putting the UIWebView and getting the app cache to cache all files. I think I need to increase the cache. For now, I have it opening up Safari and it works great. Here is what might work: Link1, Link2, Link3. These guys seem to have got it to work – I need to get my app out and working.
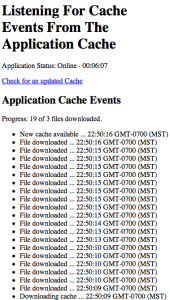
    6. It works and works great. Click on this link and see the top data (my stuff) loading and the app cache stuff loading live. At the time of writing this, the bottom of the page is quite texty. I need to jQuery it to get it snazzy and graphical.
    7. Turn off the wireless (enter the airplane mode) and keep browsing the links. AMAZING!

      This is the file that gets scraped for the links into a manifest file which is a list of the resources that get cached - offline. Pics too.

      This is the file that gets scraped for the links into a manifest file which is a list of the resources that get cached – offline. Pics too.

The geekery that makes it work - the text version. jQuery to come

The geekery that makes it work – the text version. jQuery to come

HTML5, Manifest files and offline content

So I think I have uncovered something major. In my iOS security app for the preschoolers, I plan to include or make a separate app for looking at curriculum. I WAS going to download to the local app an html page, scrape the links, download those resouces, change the local html page links to local links and – voila- an offline app. Genious … well, it has already been invented with html5 (isn’t it always the way).  I noticed it while looking up how to specify local iOS urls (see part where it says CSS Ninja).

Here are 2 EXCELLENT articles and Q&A’s below them. I am going to try this- it is exactly what I need to make the curriculum offline. Why, if I am reading/reviewing with my kids do I need curriculum offline. I am an at-home and not a circus dad you might say . . . yes, but my wireless router is in the basement and I have a 3 year old with a 3 year old attention span and so do many other parents out there. 3G is still quite slow and I am not sure when Telus here in Calgary is going 4G – besides when the wifi is going in and out and has 1/2 the bars – the phone is so busy establishing which network to use, that it does not download any webpages. Also typing into my facebook app the different sets of curriculum for 3 different kids ages that I require is tedious and annoying – one page that links all of this? Great – just what I need. This offline approach is just what I need I hink and other need as well from small interviews I had with other dads (moms don’t do this techno-learning quite as intensely). Read on over the next while to see how things are going. I am going to serve up the pages and manifest files with php.

The 2nd is beyond a stunning example of someone who knows what he is doing and is referenced by the 1st in the comments as to why things are not going well. Read them in the following order.

First, the content comes from wordpress. This will be a wordpress plugin and I will be using Netbeans PHP for this v7.3 . I have used Netbeans for Java development, but not php – there is a plug in for wordpress plugins.

In short, here is what needs to happen

  1. we need to wrap the html content from wordpress with an html5 wrapper with a manifest directive
  2. serve up the webpage manifest file which is the offline magic file with the proper Content-type: text/cache-manifest  (or put it in a dir with an .htaccess file) and ensure this file NEVER gets cached until it is a mature project.
  3. Serve up a manifest file EACH load (so put the date/time/ip address as a comment in the manifest file) with a reference to every html link, image and pdf in the html content.

Step 0 – Setup

  1. Installed wordpress in a new subdirectory with a new database etc.
  2. Started a new project in netbeans. The wordpress additions require all the credentials of the database etc. These are in the wp-config.php file in the root directory of the new wordpress installation. The DB_HOST is the host of your installation which for wordpress is normally localhost. Since I am developing at home and it is hosted on the web, this needed to change to my server and I had to use the control panel to open up port 3306 (MySQL port) on the web. To only allow my host at home, use ipchicken.com to find your ip.
  3. AHH! Got the error ‘Error establishing a database connection’. Solved it here.
  4. I had a lot of fiddling getting Netbeans to be in a place that made uploading to github easy and would run on my local Mac webserver. (ok – it took another 2 hours to get my Mountain Lion install of apache working too)

Step 1 Get content from WordPress

[html]
<code><!doctype html>
<html lang="en" <mark>manifest="mymanfile.php"</mark>></code>
[/html]

iPhone app for family connection and preschool security camera viewer

The human request was to see all the video camera feeds from the preschool classroooms on an iphone.

Great: This is an app for a non-profit organization that has preschool classes and other ages above this. The intent is that parents can take the material and continue mentoring their kids ALONG with the organization. This organization is a church – so that is why the family focus.

Step 1 – Make it a tabbed app. Since the video portion is not going to be the only use for the app lets make it a tabbed app.

Step 2 – figure out the video feeds. These are foscam FW8919W cameras (I can’t believe they sell for <$90 – these are beyond full featured cameras). Here is the link to figure all this out from foscam.  It turns out that the most memory efficient is the MJPEG route with an UIImage item. Googling revealed this guy who has a side-by-side test of a web view vs. image view on the iphone and helped me figure this out. I used his class he has in that app – thank you.

Step 3 – using storyboarding and a UI Scroll View with paging enabled, the app loads in a jiffy. Now I need to unhard code it (arrgg) … but that is done as well.  That article also outlines how to do a page controller. Don’t forget to set the .numberOfPages property which that article is missing. I also changed a label above the movie so you know what room in english you are looking at.

Step4 – add a web browser UIWebView to the 2nd storyboard and a back button to make it go back

Step5 – make a webpage and link it into step 4 (this took the longest ironically). The size is 320 by 420px for an iPhone

Step6 – add in some user preferences so that when the user comes back – it remembers the last camera it was viewing.

Step7 – test it all. Finally after about 6 hours it all works.

Testing on the real iPhone

Now I upgraded my iPhone to version 6 and my XCode does go to version 6 because I am still running Leopard for performance reasons. I guess I will have to upgrade to Lion now (arrg)

Now I noticed things that I could not on the simulator

  • I cannot scroll my PDFs in the UIWebview
  • The system should tell me when I am in an environment where it won’t work (it only should work in the intranet – the over the internet)
  • a few other details like turning off cameras when the paged view of the cameras was not on that particular camera
  • camera should not rotate. This was a little tricky. I tried to edit the orientations method- (BOOL)shouldAutorotateToInterfaceOrientation:(UIInterfaceOrientation)interfaceOrientationbut to no avail. Edit the AppName-Info.plist and delete the rows (or plist entries) for all devices (ipad and iPhone that are not button bottom.

Finishing Touches

  • made all icons as per this article and dragged them from the finder into the app’s main page in xcode and the summary tab
  • reconnect everything in the iPad story board (re-learn, re-remember all the connections you did)

Here are some quick links for now so that everyone can follow what I had to do to get this working. When I have time, I will back fill the information in:

iPhone streaming viewer

One camera that sticks out to be more value than they charge for it is the Foscam FI8919 series. It has a web server built in and can stream in multiple formats. The config is super easy – and if Windows was the end use – could have multiple cameras all show up on one screen!  Each camera is $89 CDN – that is … “start the car!” …. a crazy low price and they work – and keep working (for over a year now – non-stop)! They answer emails in a flash too and there is lots of forums of people doing all sorts of things. The end destination is XBMC which is a superb piece of software which I wrote the just-use-the-filename plug in. It is used for viewing the video feeds from the security cameras which we cycle from camera to camera every 25 seconds but also the iPhone for parents to monitor what is going on in the nursery rooms.

What I have learned is that instead of using a browser to capture the image in iOS, is to use instead a UIImage and send MJPEG video format to it. WHat this format is is JPEGs sent in sequence to the UIImage View which can handle this no problem. It is much cheaper on memory which for handheld devices is much better. Here are the links I used to figure out how to get the tool working. Kudos to these guys who figured all this out so I could use it.

http://thinkflood.com/support/redeye/software/open-source-software/motion-jpeg-image-view-ios/

Now I just need to integrate it into an app that is bigger than just looking at various cameras at the non-profit organization but to make an app that will help parents connect with their kids with the curriculum provided at this organization.

Once I get a nice name for it – I will publish a link to the name. This is all being done on a volunteer basis – so it might take a while.